Magnetic guide sewing offers a remarkably simple, strong, and silent closure solution, perfect for pouches, bags, and even clothing projects.
This technique utilizes magnetic snaps, eliminating the need for traditional buttons or zippers, streamlining your sewing process significantly.
What is Magnetic Guide Sewing?
Magnetic guide sewing is a modern sewing technique that employs magnetic snaps as a convenient and secure closure method. Unlike traditional fasteners like buttons, zippers, or Velcro, magnetic snaps connect with a satisfying click, offering a sleek and nearly invisible finish.
This method involves embedding two parts of a magnetic snap – typically a ring and a cap – into fabric layers. The magnetic force then holds the fabric pieces together. It’s particularly well-suited for projects where ease of use and a clean aesthetic are desired, such as pouches, handbags, and garments. The technique is gaining popularity due to its simplicity and the strong, reliable closure it provides.
Benefits of Using Magnetic Guides
Magnetic snap closures offer numerous advantages for sewing projects. They are incredibly easy to use, requiring minimal effort to connect and disconnect, making them ideal for frequent access items. The closure is remarkably strong and secure, providing reliable fastening for bags and pouches.
Furthermore, magnetic snaps create a clean, streamlined appearance, as they remain largely hidden within the fabric. They operate silently, unlike zippers or buttons, and are a fantastic alternative for individuals with dexterity challenges. This technique simplifies construction and elevates the finished product’s overall quality and user experience.
Essential Tools and Materials
Successful magnetic guide sewing requires magnetic snaps, a sewing machine, appropriate needles, fabric, and tools for marking and precise snap placement.
Magnetic Snaps: Types and Sizes
Magnetic snaps come in various types, primarily differing in strength and construction. Common types include standard magnetic snaps, featuring two interlocking pieces, and heavy-duty options for more secure closures. Sizes range significantly, typically measured in millimeters (mm), from small 6mm snaps ideal for delicate fabrics to larger 20mm snaps suitable for heavier materials like jackets or bags.
Consider the weight and thickness of your fabric when selecting a size; heavier fabrics require larger, stronger snaps. Beyond standard snaps, you’ll find concealed or hidden magnetic snaps designed for a more seamless, invisible finish. The choice depends on the project’s aesthetic and functional needs, ensuring a reliable and attractive closure.
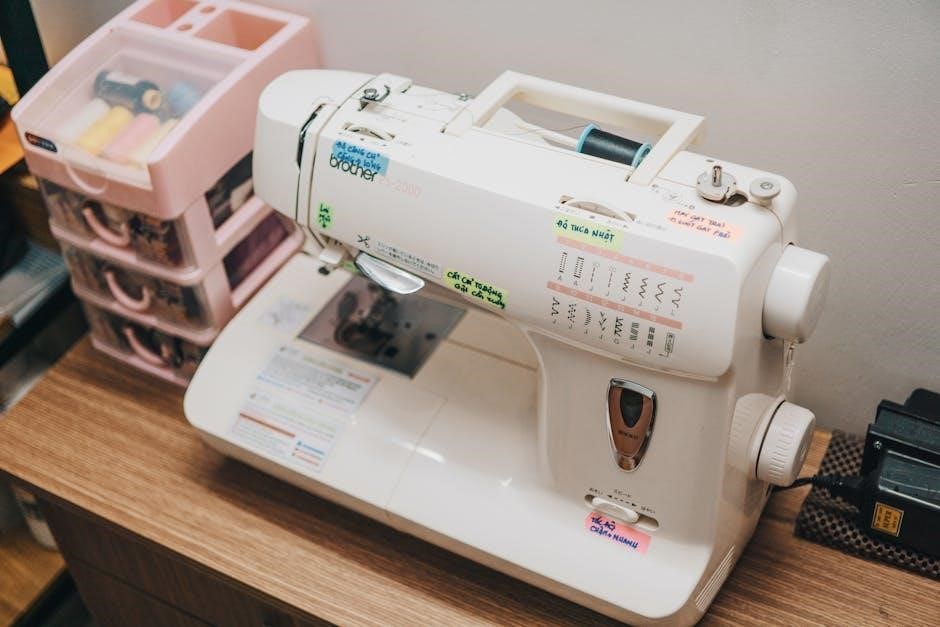
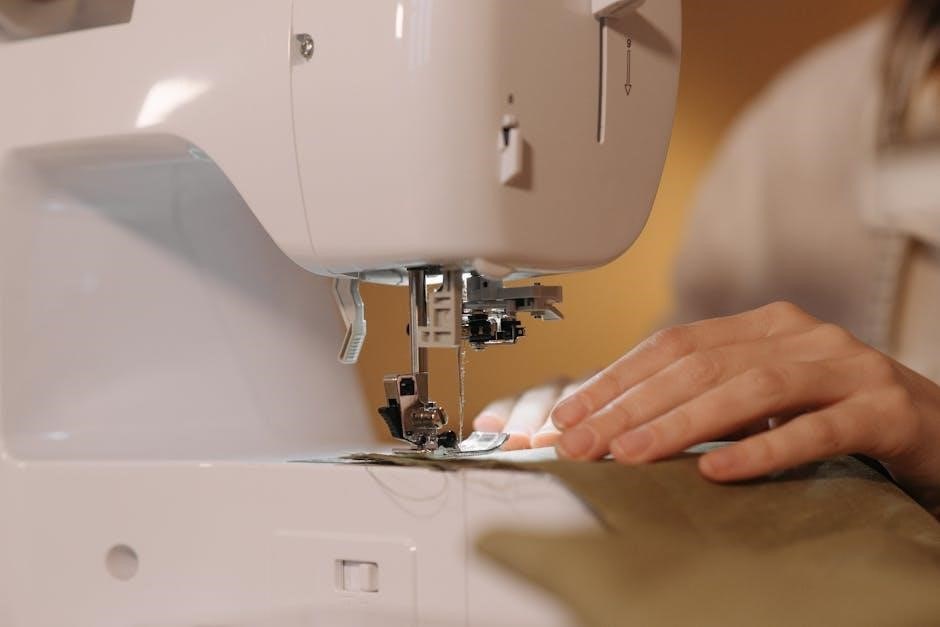
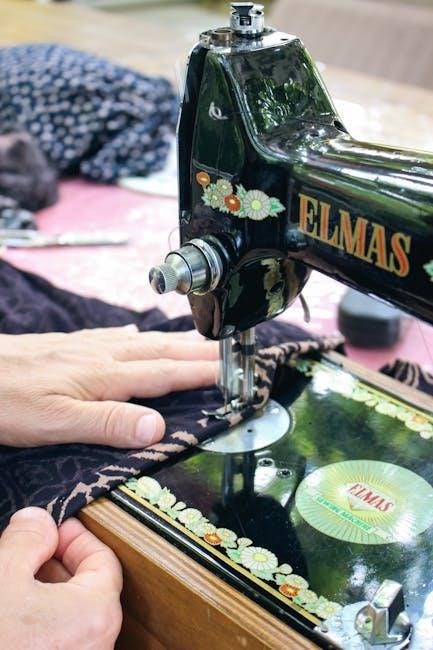
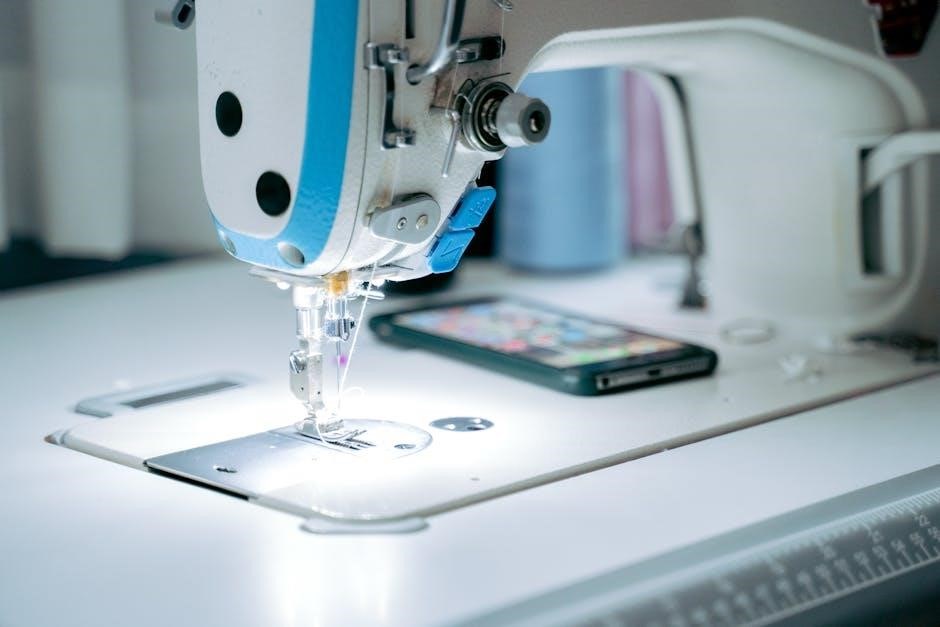
Sewing Machine and Needles
A standard sewing machine is perfectly adequate for installing magnetic snaps, though a machine with adjustable presser foot pressure is beneficial for thicker fabric layers. Straight stitch capability is essential. Needle selection is crucial; a universal needle size 80/12 or 90/14 generally works well, depending on fabric weight.
For heavier materials like denim or canvas, a size 16/100 needle might be necessary. Always use a fresh, sharp needle to prevent fabric damage and ensure clean snap placement. Consider a denim needle for particularly robust fabrics. Regularly check your machine’s tension to achieve balanced stitches around the snap area, enhancing durability.
Fabric Choices for Magnetic Snap Closures
Versatility is key when selecting fabrics for magnetic snap closures. Lightweight to medium-weight fabrics like cotton, linen, and quilting cotton work exceptionally well, offering sufficient stability. Plush, canvas, or faux fur are also suitable, though may require reinforcement. Avoid extremely thin or delicate fabrics that might tear easily under snap pressure.
Consider the fabric’s weave; tighter weaves provide better snap support. For heavier fabrics, interfacing can add necessary structure. The chosen fabric should complement the project’s aesthetic and withstand regular use. Remember to test the snap installation on a scrap piece first!
Preparing Your Fabric
Accurate cutting and precise marking are crucial for successful magnetic snap application, ensuring proper alignment and a professional finish to your project.
Cutting Fabric for Magnetic Snap Application
Precise fabric cutting is paramount when incorporating magnetic snaps. Begin by carefully measuring and marking the areas where the snaps will be positioned on your fabric pieces. Consider the size of the snap components – both the receiver and the magnet itself – and add a small seam allowance around each marked location, typically around 1/2 inch.
Use sharp fabric scissors or a rotary cutter with a cutting mat to ensure clean, accurate cuts. For thicker fabrics, multiple layers might require careful handling to prevent shifting. Double-check your measurements before cutting to avoid errors that could compromise the snap’s functionality and aesthetic appeal. Accurate cuts contribute significantly to a professional-looking final product.
Marking Placement for Magnetic Snaps
Accurate marking is crucial for successful magnetic snap installation. Begin by determining the desired closure point on your fabric pieces. Use a fabric marker or tailor’s chalk to lightly mark these locations. Ensure the snap positions align perfectly when the fabric pieces are joined, considering any overlap needed for a secure closure.
For pouches or bags, mark corresponding points on both the flap and the body. Test the alignment by temporarily holding the snap pieces in place. Precise marking prevents misalignment and ensures a functional, aesthetically pleasing closure. Remember to account for seam allowances when marking, ensuring the snaps won’t be directly in the seam.
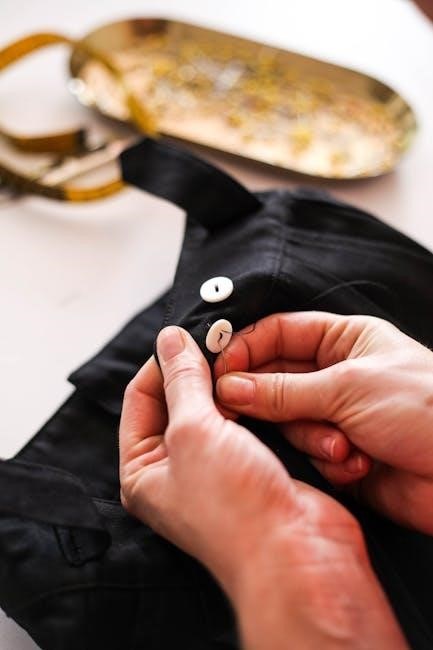
Installing Magnetic Snaps: Step-by-Step
Securely attaching magnetic snaps involves a straightforward process: position the snap halves, carefully apply pressure, and reinforce for lasting durability and reliable closure.
Attaching the Snap Pieces – Part 1
Begin by identifying the snap pieces – typically, one side will have a raised post and the other a receiving socket. Place the piece with the post onto the fabric where you’ve marked its position, ensuring the correct side is facing up for proper closure functionality.
Using a suitable tool (often included with the snap kit, or pliers carefully padded to avoid scratching), apply firm, even pressure to push the post through the fabric. It’s crucial to avoid excessive force, which could damage the fabric or the snap itself. Repeat this process for all corresponding snap pieces, maintaining consistent placement according to your markings.
Double-check alignment before proceeding to Part 2, ensuring the snaps will meet correctly when the fabric pieces are joined.
Attaching the Snap Pieces – Part 2
Now, take the remaining snap pieces – those with the receiving sockets – and position them onto the corresponding fabric sections, aligning them carefully with the posts already attached. Ensure the socket openings face inwards, ready to receive the posts for a secure closure.
Again, using your chosen tool, apply firm and even pressure to secure the sockets onto the fabric. This step firmly connects the two sides of the snap closure. Verify that each socket fully encompasses its corresponding post, creating a strong magnetic connection.
Gently test each snap to confirm a solid hold before moving on to reinforcement.
Reinforcing the Snap Attachment
To ensure lasting durability, reinforcing the snap attachment is crucial. Apply a small amount of fabric glue around each snap piece on the wrong side of the fabric. This prevents fraying and adds an extra layer of security against pulling.
Consider stitching around each snap with a close zigzag stitch, further solidifying its position. This is particularly important for frequently used items like pouches or clothing closures. Use a thread color that blends with your fabric for a discreet finish.
Allow the glue to dry completely before handling the item, guaranteeing a robust and reliable magnetic snap closure.

Using Magnetic Guides During Sewing
Magnetic guides simplify precise stitching for both straight lines and curves, enhancing accuracy and efficiency in various sewing projects, like quilting.
Straight Stitching with Magnetic Guides
Achieving perfectly straight stitches becomes incredibly easy with magnetic guides. Position the guide alongside your desired seam allowance on the sewing machine’s throat plate.
The magnetic force securely holds the guide in place, preventing shifting during sewing, which is especially helpful for beginners or lengthy seams. This eliminates the need for constant visual checks and adjustments, resulting in consistently straight and professional-looking results.
Experiment with different guide placements to accommodate varying seam allowances. Remember to test on scrap fabric first to ensure accurate alignment before working on your final project. Magnetic guides truly elevate the precision and speed of straight-stitch sewing.
Curve Sewing with Magnetic Guides
Navigating curves can be challenging, but magnetic guides offer a clever solution. While not as straightforward as straight stitching, small, strategically placed magnetic guides can assist in maintaining a consistent distance from the edge.
Use multiple guides for more complex curves, repositioning them frequently as you sew. Alternatively, consider using a flexible magnetic strip that can be gently bent to follow the curve. Slow and steady stitching is key, allowing you to carefully maneuver the fabric along the guided path.
Practice on scraps to master the technique and achieve smooth, even curves with confidence.
Quilting with Magnetic Guides
Magnetic guides can surprisingly aid in quilting, particularly for straight-line or echo quilting. Attach small magnetic guides to the quilting ruler to maintain a consistent distance from the previous stitch line, ensuring even spacing.
This is especially helpful for beginners or those struggling with free-motion quilting; For larger quilts, consider using a longer magnetic strip as a temporary guide, repositioning it as you progress. Remember to use a walking foot for even fabric feed.
Experiment with different guide placements to achieve varied quilting patterns and enhance your quilt’s design.
Troubleshooting Common Issues
Addressing challenges like misalignment, puckering, or weak snap strength is crucial for successful magnetic snap application and a professional finish.
Snaps Not Aligning Properly
Misalignment is a frequent issue when installing magnetic snaps, often stemming from inaccurate initial markings or fabric shifting during attachment. Before securing the snaps, meticulously double-check the placement on both fabric layers, ensuring they directly oppose each other.
Use a ruler or specialized magnetic snap alignment tools to guarantee precision. If misalignment occurs, carefully remove the incorrectly placed snap using a seam ripper and reattach it, taking extra care with positioning. Reinforcing the fabric around the snap with interfacing can also help prevent movement and maintain alignment throughout the sewing process, leading to a secure and functional closure.
Fabric Puckering Around Snaps
Puckering around magnetic snaps often indicates insufficient fabric support or excessive tension during installation. To mitigate this, utilize a lightweight interfacing fused to the wrong side of the fabric where the snaps will be attached; this provides crucial stabilization.
When sewing, reduce the presser foot pressure on your machine and consider using a shorter stitch length. Avoid stretching the fabric while attaching the snaps. If puckering persists, gently ease the fabric around the snap after attachment, or carefully clip into the seam allowance close to the snap to relieve tension, ensuring the clipping doesn’t compromise snap security.
Snap Strength and Security
Ensuring snap strength is paramount for a reliable closure. Reinforce the snap attachment by backstitching several times when securing the snap pieces, and consider using a reinforcing stitch around the entire snap perimeter. Selecting the correct snap size for the fabric weight is also crucial; heavier fabrics require larger, stronger snaps.
Avoid overcrowding the snap area with too many layers of fabric, as this can weaken the hold. Regularly test the snap closure throughout the project’s construction to identify and address any potential weaknesses early on. Proper installation and appropriate snap selection guarantee long-lasting security.
Advanced Techniques
Explore refined methods like invisible snap installation for a seamless finish, or utilize multiple magnetic snaps for enhanced security and design complexity.
Invisible Magnetic Snap Installation
Achieving a truly invisible magnetic snap closure requires careful fabric preparation and precise placement. Begin by interfacing the fabric where the snaps will be attached, providing stability without bulk. Instead of directly sewing the snap onto the right side of the fabric, create a small, hidden pocket within the lining.
This pocket securely holds the snap, concealing it completely from view. Use a coordinating thread color to minimize visibility of any stitching. Reinforce the pocket’s stitching thoroughly, as it bears the snap’s weight and stress. This technique is ideal for garments or bags where a clean, minimalist aesthetic is desired, offering functionality without compromising the design’s visual appeal.
Using Multiple Magnetic Snaps
Employing multiple magnetic snaps significantly enhances closure security and distribution of stress, particularly for larger openings or heavier items. Strategically position the snaps along the closure edge, ensuring even spacing for optimal hold. Consider the weight and contents of the item when determining the number of snaps needed – heavier items require more.
This method is excellent for jackets, larger bags, or projects needing a robust closure. Reinforce each snap’s attachment point meticulously, as they work collectively. Proper alignment is crucial; test the closure frequently during installation to guarantee a seamless and secure fastening experience.
Project Ideas for Magnetic Guide Sewing
Explore diverse projects like stylish pouches, convenient bags, and fashionable clothing items such as jackets and dresses, all benefiting from magnetic snap closures.
Pouches and Bags with Magnetic Closures
Magnetic snaps are exceptionally well-suited for pouches and bags, offering a secure yet easily accessible closure. Consider crafting a faux fur pouch, utilizing a single pattern piece for streamlined construction – plush or canvas are excellent fabric alternatives too!
These closures eliminate the fuss of zippers or buttons, providing a clean and modern aesthetic. They’re particularly effective for smaller bags where a bulky closure isn’t desired. The strength of magnetic snaps ensures your belongings remain safely contained, while the ease of opening and closing adds convenience to everyday use. Experiment with different sizes and placements to achieve the perfect fit and functionality for your bag designs.
Clothing Applications: Jackets and Dresses
Magnetic snaps present innovative closure options for garments like jackets and dresses, offering a sleek and often invisible alternative to traditional methods. Imagine a jacket with a hidden magnetic closure, providing a streamlined silhouette without visible buttons or zippers!
They’re particularly useful in designs where maintaining a clean aesthetic is paramount. For dresses, magnetic snaps can be strategically placed for easy on-and-off access, especially in areas requiring minimal visibility. Consider reinforcing the attachment points for heavier fabrics to ensure lasting security. This technique adds a touch of modern convenience to classic clothing designs.
Resources and Further Learning
Expand your skills with online tutorials and comprehensive sewing books dedicated to magnetic snap techniques and innovative fastening solutions;
Online Tutorials and Courses
Numerous online platforms offer fantastic resources for mastering magnetic snap application. YouTube channels dedicated to sewing frequently showcase step-by-step tutorials, covering everything from basic installation to advanced techniques like invisible closures. Skillshare and Creativebug provide structured courses, often led by experienced sewing instructors, offering in-depth knowledge and personalized feedback.
These courses delve into selecting the right snap size for your fabric weight, ensuring secure attachment, and troubleshooting common issues like misalignment or weak closures. Many tutorials also demonstrate creative project ideas, inspiring you to incorporate magnetic snaps into various sewing endeavors, from stylish pouches to convenient clothing closures. Don’t hesitate to explore these digital learning opportunities!
Recommended Books on Sewing Techniques
While dedicated books solely on magnetic snap sewing are rare, several comprehensive sewing technique guides cover them effectively. “Reader’s Digest Complete Guide to Sewing” provides a solid foundation in closures, including detailed instructions on installing various snaps. Similarly, “The Sewing Book” by Alison Smith offers clear diagrams and explanations for secure snap attachment.
Look for books focusing on bag making or garment construction, as these often feature projects utilizing magnetic snaps. These resources emphasize fabric preparation, proper tool usage, and reinforcement techniques for lasting durability. Supplementing online tutorials with a well-illustrated book can significantly enhance your understanding and skill set.