Daikin Installation Manual: A Comprehensive Guide
This manual details Daikin system installation, covering split, multi-split, and VRV/VRF units. It includes guides for BRC1D52, operation, and technical aspects.
Daikin installation requires skilled technicians familiar with refrigerant handling and electrical safety. Proper installation ensures optimal performance, energy efficiency, and system longevity. This guide covers various Daikin systems, from simple split units to complex VRV/VRF setups, referencing manuals like the BRC1D52 series.
Successful installations depend on accurate site surveys, correct refrigerant charging, and thorough commissioning. Understanding Daikin’s Altherma and EWWQ-KB chiller series requires specialized knowledge. Cashback promotions are available for certain models, like the EPRA, until March 31, 2025, incentivizing professional installation.
Understanding Daikin System Types
Daikin offers diverse HVAC solutions, each with unique installation requirements. Split systems are common for single-zone cooling and heating, while multi-split systems serve multiple indoor units from one outdoor unit; VRV/VRF systems provide advanced zoning and energy control for larger buildings.
The Daikin Altherma series, including ERPA models, utilizes hydronic heating, demanding specific plumbing connections. EWWQ-KB chillers, often paired with cooling towers, require water-cooled system expertise. Choosing the right system depends on the building’s size, layout, and heating/cooling needs, as seen in Perfera and Stylish models.
Split Systems Installation Overview
Daikin split system installation involves mounting an indoor unit to a wall and connecting it to an outdoor unit via refrigerant piping. Proper refrigerant lines, electrical wiring, and condensate drainage are crucial. Installation typically takes around one minute for basic functionality, but thorough checks are vital.
Consider unit placement for optimal airflow and accessibility. Electrical connections must adhere to safety guidelines. Refrigerant charging requires precise measurements, avoiding over or under-filling. Models like the Perfera demand careful installation to prevent issues reported by users, ensuring long-term reliability.
Multi-Split Systems Installation Overview
Daikin multi-split systems connect multiple indoor units to a single outdoor unit, offering zoned climate control. Installation is more complex than single-split systems, requiring careful refrigerant line sizing and routing to each indoor unit. Choosing between Daikin Perfera and Mitsubishi/Samsung requires consideration of BTU needs (9000/12000).
Proper wiring and addressing of each indoor unit are essential for correct operation. Users report issues with new installations, highlighting the importance of a qualified technician. Cashback promotions are available for certain models, like the EPRA, until March 31, 2025.
VRV/VRF Systems Installation Overview
Daikin VRV/VRF systems are advanced, offering simultaneous heating and cooling in different zones. Installation demands highly skilled technicians due to complex controls, extensive refrigerant piping, and precise commissioning. These systems are ideal for larger buildings or renovations needing flexible climate control.
Proper system design is crucial, considering building load calculations and optimal unit placement; Installation quality directly impacts long-term reliability, as reported by users experiencing issues with newer Perfera models. Detailed technical guides and user manuals (BRC1D52) are essential for successful implementation.
Pre-Installation Considerations
Before commencing Daikin installation, thorough planning is vital. A detailed site survey determines optimal indoor and outdoor unit placement, considering airflow and accessibility for maintenance. Electrical requirements must be verified, ensuring adequate wiring and circuit capacity to prevent issues like those reported with Stylish models.
Refrigerant piping needs careful consideration, calculating lengths and diameters to minimize pressure drop. Cashback promotions (until 31/03/2025) may influence system choices. Adhering to safety guidelines and local regulations is paramount for a compliant and efficient installation.
Site Survey and Unit Placement
A comprehensive site survey is crucial for successful Daikin installation. Assess indoor locations for airflow, avoiding obstructions and ensuring even temperature distribution, like with Perfera models. Outdoor unit placement requires ample space, away from direct sunlight and prevailing winds. Consider noise levels impacting neighbors.

Verify structural integrity for mounting both indoor and outdoor units. Account for service access for future maintenance and repairs. Proper placement minimizes refrigerant line lengths, enhancing system efficiency and reducing potential leak points, as seen in Altherma installations.
Electrical Requirements and Wiring
Daikin systems demand specific electrical configurations. Confirm voltage, phase, and amperage align with the unit’s nameplate data. Dedicated circuits are essential to prevent interference with other appliances. Employ appropriately sized wiring and circuit breakers, adhering to local electrical codes. Grounding is paramount for safety, protecting against electrical shock.
Follow Daikin’s wiring diagrams meticulously during installation. Use approved conduit and connectors for weather protection. Double-check all connections for tightness and polarity. Incorrect wiring can cause system malfunction, damage components, or create fire hazards, especially with EWWQ-KB chillers.
Refrigerant Piping Considerations
Proper refrigerant piping is crucial for Daikin system efficiency and longevity. Select the correct pipe size based on unit capacity and piping length, minimizing pressure drop. Use only Daikin-approved piping materials, compatible with the refrigerant type. Ensure pipes are properly insulated to prevent heat gain or loss, maintaining system performance.
Avoid sharp bends and kinks in the piping, restricting refrigerant flow. Purge the lines thoroughly during installation to remove air and moisture. Pressure test the piping for leaks before charging with refrigerant. Follow Daikin’s guidelines for brazing and sealing connections, preventing contamination.
Installation Steps: Indoor Unit
Begin by carefully mounting the indoor unit to a structurally sound wall, ensuring proper leveling and clearance. Connect the refrigerant piping to the designated connections, utilizing flare nuts and appropriate sealing techniques. Proceed with electrical connections, adhering strictly to local codes and Daikin’s wiring diagrams.

Double-check all connections for tightness and correct polarity. Securely route wiring and piping, preventing strain or damage. Confirm proper airflow around the unit, avoiding obstructions; Test the unit’s functionality briefly before proceeding to outdoor unit installation.
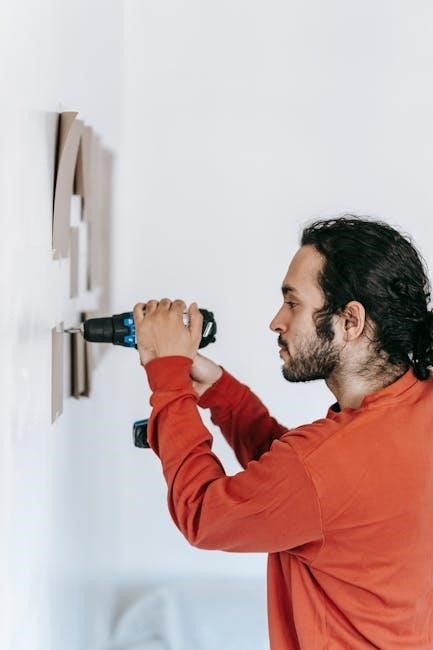
Mounting the Indoor Unit
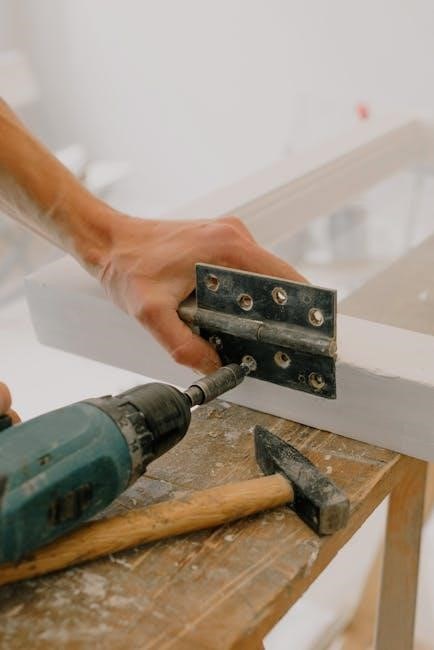
Select a suitable location considering airflow, noise levels, and accessibility for maintenance. Ensure the wall can support the unit’s weight, utilizing appropriate mounting brackets and screws. Carefully mark and drill pilot holes, avoiding electrical wiring and plumbing. Securely attach the mounting plate to the wall, ensuring it is level.
Lift the indoor unit onto the mounting plate, verifying a snug and stable fit. Check for any gaps or misalignment, adjusting as needed. Confirm the unit is firmly secured before proceeding with refrigerant and electrical connections.
Connecting Refrigerant Piping (Indoor Unit)
Carefully flare the refrigerant pipes to ensure a tight, leak-proof connection. Apply refrigerant oil to the flare surfaces for lubrication and sealing. Connect the refrigerant pipes to the indoor unit’s designated connections, tightening the flare nuts securely with a wrench.
Avoid over-tightening, which can damage the flare fittings. Insulate all refrigerant piping to prevent heat gain or loss and minimize condensation. Inspect connections for any signs of leaks before proceeding to evacuation and charging.
Electrical Connections (Indoor Unit)
Before making electrical connections, completely disconnect the power supply at the main breaker. Identify the correct wiring diagram for your specific Daikin indoor unit model. Connect the power supply wires to the designated terminals on the indoor unit’s control board, ensuring proper polarity.
Securely fasten the wiring to prevent strain or accidental disconnection. Connect the communication wires for remote control and system control. Double-check all connections before restoring power, verifying correct wiring and secure terminations.
Installation Steps: Outdoor Unit
Begin by carefully positioning the outdoor unit on a stable, level surface, ensuring adequate clearance for airflow and maintenance. Secure the unit using appropriate mounting brackets or a concrete pad, protecting it from vibration and external elements. Connect the refrigerant piping from the indoor unit to the outdoor unit, following manufacturer’s guidelines.
Proceed with electrical connections, adhering to local codes and safety regulations. Verify proper grounding and secure wiring. Before operation, confirm all connections are tight and the unit is correctly leveled for optimal performance and longevity.
Positioning the Outdoor Unit
Selecting the right location is crucial for Daikin outdoor unit performance. Ensure ample space around the unit for proper airflow – minimum clearances are specified in the installation manual. Avoid direct sunlight and areas prone to excessive snow or debris accumulation. The surface must be level and capable of supporting the unit’s weight, utilizing a concrete pad or mounting brackets.
Consider noise levels and proximity to neighbors. Protect the unit from strong winds and corrosive environments. Proper positioning minimizes operational issues and maximizes the system’s efficiency and lifespan.
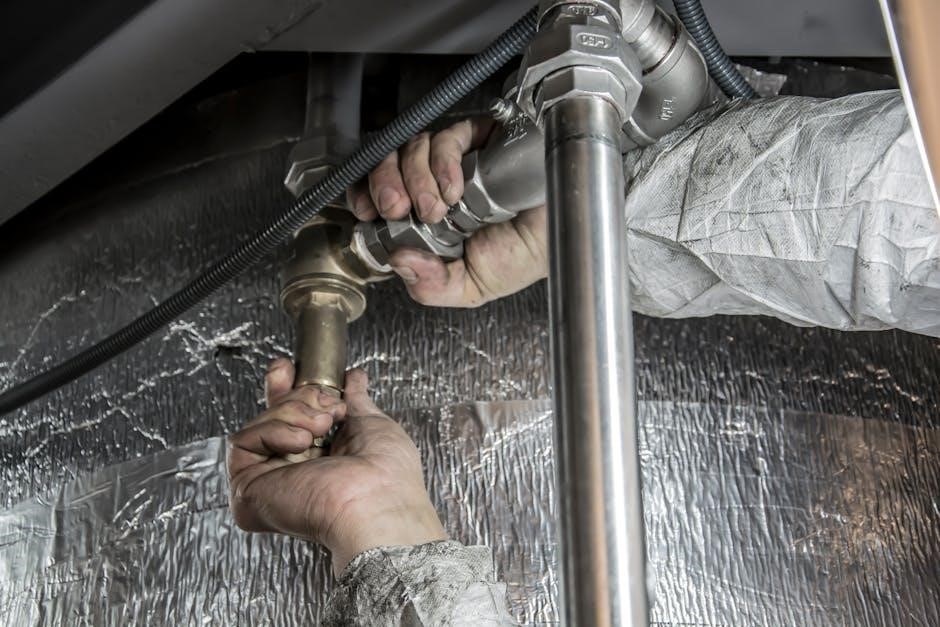
Connecting Refrigerant Piping (Outdoor Unit)
Carefully connect refrigerant lines to the outdoor unit’s service ports, ensuring proper sizing and flare nut tightening. Use the specified refrigerant type – incorrect refrigerant damages the system. Purge the lines with nitrogen during connections to prevent contamination. Proper brazing techniques are essential to avoid leaks; use a dry nitrogen purge during the process.
Insulate all refrigerant piping to minimize heat gain or loss and prevent condensation. Verify all connections for tightness before proceeding to evacuation and charging. Follow Daikin’s guidelines for pipe routing and support to prevent stress on the connections.
Electrical Connections (Outdoor Unit)
Before making electrical connections, completely disconnect power at the main breaker. Verify the outdoor unit’s voltage matches the supply voltage. Use appropriately sized wiring and conduit, adhering to local electrical codes. Connect the ground wire securely to the designated grounding terminal. Double-check all connections for tightness and proper insulation.
Employ a dedicated circuit for the outdoor unit to prevent overloading. Utilize weatherproof connectors and enclosures for all outdoor electrical components. Follow Daikin’s wiring diagrams precisely to avoid damage to the unit’s control system.
Refrigerant Charging and System Evacuation
Proper evacuation is crucial for optimal system performance and longevity. Use a vacuum pump to remove air and moisture from the refrigerant lines, achieving a 500-micron vacuum or lower. Ensure all connections are tight to prevent leaks during evacuation. Verify the vacuum level with a digital manifold gauge set.
Charge the system with the correct refrigerant type and amount, as specified on the unit’s nameplate. Avoid overcharging or undercharging, as this can damage the compressor. Monitor superheat and subcooling during charging to ensure accurate refrigerant levels.
Proper Refrigerant Type and Amount
Daikin systems require specific refrigerants; using the incorrect type can cause severe damage. Consult the unit’s nameplate and installation manual to identify the correct refrigerant – typically R32 or R410A. Ensure the refrigerant is stored and handled according to safety regulations.
The required refrigerant amount varies based on the system’s capacity and piping length. Refer to the manufacturer’s charts for precise charging weights. Accurate charging is vital for optimal efficiency and preventing compressor failure. Avoid liquid refrigerant entering the compressor during charging.
Evacuation Procedures and Vacuum Testing
Proper evacuation is crucial to remove air and moisture from the refrigerant lines. Connect a vacuum pump and manifold gauge set to the system, ensuring all connections are tight. Evacuate for a minimum of 30-60 minutes, or until the vacuum reaches 500 microns.
Perform a leak test while under vacuum by isolating the pump and observing the vacuum gauge. If the vacuum rises, a leak is present and must be located and repaired. After confirming a leak-free system, close the valves and proceed with refrigerant charging.
Commissioning and Testing
Initial startup involves verifying all electrical connections and refrigerant piping; Power on the system and confirm the indoor and outdoor units respond correctly. Check for error codes on the display panel and address any issues immediately. Performance testing should include measuring supply and return air temperatures.
Verify proper airflow and refrigerant pressures against the manufacturer’s specifications. Program the remote control according to the user’s preferences. Ensure the system operates efficiently in both heating and cooling modes, confirming optimal comfort and energy efficiency.
Initial System Startup
Before powering on, double-check all wiring connections and refrigerant pipework for tightness and correct installation. Confirm the power supply voltage matches the unit’s requirements. Activate the main power switch and observe the indoor unit’s display for any initial error codes. Listen for the outdoor unit’s fan to start and verify proper rotation.
Monitor the system’s operation for the first few minutes, checking for unusual noises or vibrations. Ensure the remote control can communicate with the indoor unit. Address any immediate issues before proceeding to performance testing, ensuring a stable and safe startup.
Performance Testing and Verification
After startup, measure supply and return air temperatures to confirm proper cooling or heating. Verify airflow across all vents, ensuring balanced distribution throughout the space. Monitor refrigerant pressures using gauges, comparing readings to the manufacturer’s specifications. Check for any leaks around connections and joints.
Assess the system’s capacity by observing how quickly it reaches the set temperature. Confirm the remote control accurately adjusts settings and displays correct information. Document all readings for future reference and troubleshooting, ensuring optimal performance.
Remote Control Setup and Programming
Initially, insert batteries into the remote control and power it on. Pair the remote with the indoor unit following the manufacturer’s instructions, typically involving holding a specific button. Configure settings like temperature units (°C or °F) and time. Program preferred schedules for automated operation, optimizing energy efficiency.
Familiarize yourself with all available modes – auto, cool, heat, dry, and fan. Test each function to ensure proper operation. Adjust fan speed and vane direction for personalized comfort. Refer to the user guide for advanced features and troubleshooting tips.
Troubleshooting Common Installation Issues
Refrigerant leaks during installation require immediate attention; use leak detectors and nitrogen pressure testing. Electrical connection problems often stem from loose wiring or incorrect voltage – verify all connections. Airflow issues can be caused by blocked filters, incorrect ductwork, or improper fan settings.
Insufficient refrigerant charge leads to reduced cooling/heating; accurately measure and add refrigerant. Check for kinked refrigerant lines restricting flow. Ensure proper unit leveling to prevent compressor issues. Consult the Daikin manual for specific error codes and solutions.
Refrigerant Leaks During Installation
Refrigerant leaks are critical during installation, demanding immediate attention. Utilize electronic leak detectors to pinpoint the source, focusing on flared connections and service valves. Nitrogen pressure testing is crucial – pressurize the system to identify leaks before evacuation. Proper brazing techniques are essential; ensure clean, dry joints.
Tighten all fittings to the manufacturer’s specifications, avoiding over-tightening. Inspect refrigerant lines for damage during handling and installation. Address leaks promptly to prevent system inefficiency and environmental harm. Follow Daikin’s guidelines for leak repair and refrigerant recovery.
Electrical Connection Problems
Electrical issues during Daikin installation often stem from incorrect wiring or loose connections. Verify voltage matches the unit’s requirements before connecting power. Double-check wiring diagrams, ensuring proper phase sequence and grounding. Use appropriately sized wiring and circuit breakers to prevent overloads.
Inspect wiring for damage or fraying, replacing as needed. Confirm secure connections at all terminals, tightening screws adequately. Test continuity to identify breaks in the wiring. Address any electrical problems immediately, prioritizing safety and system functionality.
Airflow Issues and Solutions

Reduced airflow in a Daikin system can indicate several problems. Check air filters for blockage, replacing or cleaning them as necessary. Inspect ductwork for leaks or obstructions, sealing any gaps. Ensure proper fan speed settings are selected on both indoor and outdoor units.
Verify coil cleanliness, cleaning if dirty. Confirm proper refrigerant charge, as low charge can affect airflow. Check for closed dampers or restricted vents. Address airflow issues promptly to maintain system efficiency and prevent component damage, ensuring optimal comfort.
Daikin Altherma Installation Specifics
Daikin Altherma installation requires careful attention to hydronic unit placement and integration. Ensure proper piping for connecting to existing heating systems, considering flow rates and thermal capacity. Verify electrical connections meet Altherma’s specifications, including dedicated circuits.
Commissioning involves setting appropriate water temperatures and flow parameters. Address potential compatibility issues with existing controls. Proper integration maximizes efficiency and comfort. Consult the specific Altherma model’s installation manual for detailed guidance, ensuring a reliable and optimized heating solution.
Hydronic Unit Installation
Hydronic unit installation demands a level surface capable of supporting its weight when full of water. Properly connect the supply and return piping, ensuring correct flow direction. Insulate all piping to minimize heat loss and prevent condensation. Install air vents at high points to eliminate trapped air, optimizing system performance.
Verify the water pressure meets the unit’s requirements. Check for leaks after initial filling and pressurization. Electrical connections must adhere to local codes and Daikin specifications. Commissioning includes purging air and verifying correct water flow rates for efficient operation.
Integration with Existing Heating Systems
Integrating Daikin Altherma with existing systems requires careful planning. Assess compatibility with current radiators or underfloor heating, ensuring adequate heat emitter surface area. Utilize a buffer tank to stabilize water temperature and improve system efficiency. Employ blending valves to optimize water temperature for different heating zones.
Bypass existing boilers correctly, preventing conflicts during operation. Configure the Daikin controller to manage both the Altherma and legacy system. Verify proper hydraulic balancing for even heat distribution. Thorough testing confirms seamless operation and optimal energy savings.
Daikin EWWQ-KB Series Chillers Installation
Installation of Daikin EWWQ-KB chillers demands adherence to specific guidelines. Prioritize adequate space for maintenance and airflow around the unit. Ensure a stable foundation capable of supporting the chiller’s weight. Connect piping according to manufacturer specifications, utilizing appropriate materials.
Electrical connections must meet local codes and chiller requirements. Properly integrate the cooling tower, verifying correct water flow and temperature control. Commissioning involves thorough testing of all safety features and operational parameters. Refer to the operation manual for detailed procedures.
Water-Cooled Chiller Specifics
Water-cooled chiller installation requires careful attention to water quality and treatment. Implement a filtration system to prevent scaling and corrosion within the chiller. Maintain proper water flow rates as specified in the Daikin EWWQ-KB series manual. Regularly monitor and adjust water chemistry to optimize performance.
Ensure adequate cooling tower capacity to reject heat effectively. Insulate all chilled water piping to minimize heat gain. Verify proper alignment of the chiller and cooling tower. Follow all safety precautions when handling water treatment chemicals.
Cooling Tower Integration
Proper cooling tower integration is crucial for Daikin EWWQ-KB chiller efficiency. Select a tower with sufficient capacity, considering chiller load and ambient wet-bulb temperature. Ensure correct water flow between the chiller and tower, adhering to manufacturer specifications. Implement drift eliminators to minimize water loss and prevent environmental contamination.
Regularly inspect and maintain the cooling tower, including fan motors, pumps, and water treatment systems. Monitor water quality and adjust treatment as needed to prevent scaling and corrosion. Verify proper airflow and water distribution within the tower.
Safety Precautions During Installation
Prioritize electrical safety by disconnecting power before making connections and grounding all components correctly. Always adhere to local electrical codes and regulations. Handle refrigerant with extreme care, wearing appropriate personal protective equipment (PPE) like gloves and eye protection. Avoid releasing refrigerant into the atmosphere; recover it using approved methods.
Use proper lifting techniques when handling heavy units to prevent injuries. Ensure the work area is well-ventilated, especially when brazing refrigerant lines. Follow all manufacturer’s safety guidelines and warnings detailed in the installation manual.
Electrical Safety Guidelines
Always disconnect power to the circuit before commencing any electrical work on the Daikin system. Verify the power is off using a reliable testing device. Ensure proper grounding of all electrical components, including the indoor and outdoor units, to prevent electrical shock. Use appropriately sized wiring and circuit breakers, adhering to local electrical codes;
Avoid loose connections and ensure all wiring is securely fastened. Never work on electrical components when they are wet or in damp conditions. Inspect wiring for damage before making connections and replace any damaged wires immediately.
Refrigerant Handling Safety
Refrigerant can cause frostbite and asphyxiation; always wear appropriate personal protective equipment (PPE), including gloves and eye protection. Work in a well-ventilated area to prevent refrigerant buildup. Never release refrigerant into the atmosphere – recover it using approved recovery equipment. Properly label all refrigerant containers and store them in a secure, well-ventilated location.
Follow all local regulations regarding refrigerant handling and disposal. Be aware of the specific refrigerant type used in the Daikin system and its associated hazards. Immediately address any refrigerant leaks to prevent environmental damage and safety risks.
Post-Installation Maintenance
Regular maintenance ensures optimal Daikin system performance and longevity. Clean or replace air filters monthly to maintain airflow and indoor air quality. Periodically inspect refrigerant lines for leaks or damage, addressing any issues promptly. Check electrical connections to ensure they remain secure and free from corrosion.
Schedule annual professional maintenance to include coil cleaning, system checks, and refrigerant level verification. Keep the outdoor unit clear of debris to allow for proper airflow. Document all maintenance activities for warranty purposes and system tracking.
Filter Cleaning and Replacement
Maintaining clean filters is crucial for Daikin system efficiency and air quality. Inspect filters monthly, and clean or replace them as needed, depending on usage and environment. Washable filters can be vacuumed or rinsed with water, ensuring they are completely dry before reinstalling.
Disposable filters should be replaced with the correct size and type specified by Daikin. Dirty filters restrict airflow, increasing energy consumption and potentially damaging the unit. Regular filter maintenance prevents dust and allergens from circulating, promoting a healthier indoor environment.
Regular System Checks
Consistent system checks are vital for long-term Daikin unit performance and reliability. Annually, a qualified technician should inspect refrigerant levels, electrical connections, and overall system operation. Check for unusual noises or vibrations, which could indicate potential problems. Inspect ductwork for leaks or damage, impacting efficiency.
Verify proper airflow and temperature differentials. Ensure the outdoor unit is free of debris and obstructions. Proactive maintenance prevents costly repairs and extends the lifespan of your Daikin system, ensuring optimal comfort and energy savings.
Warranty Information and Registration
Daikin offers comprehensive warranties on its products, protecting against defects in materials and workmanship. Warranty periods vary depending on the specific model and component. Proper registration is crucial to activate your warranty coverage; failing to register may invalidate claims. Keep your proof of purchase and installation documentation readily available.
Review the warranty terms carefully for details on covered repairs, limitations, and required maintenance. Daikin’s cashback promotions, like the Warm Switch offer ending March 31, 2025, may have separate registration requirements.

