
Prism Grout Instructions: A Comprehensive Guide (Updated 04/21/2026)
Custom Building Products introduces Prism SCG, a pre-mixed, single-component grout designed for superior performance and ease of use in flooring projects today.
This guide provides detailed instructions, covering everything from preparation to maintenance, ensuring a flawless and lasting tile installation with Prism SCG.

Prism SCG Ultimate Performance Grout represents a significant advancement in tile and grout technology, developed by Custom Building Products. Released on April 21, 2026, this innovative grout is a pre-mixed, single-component formulation, eliminating the need for traditional powder mixing and its associated inconsistencies.
Designed for both residential and light commercial applications, Prism SCG offers exceptional strength, durability, and stain resistance. Its unique polymer-modified formula delivers superior bonding to a wide variety of tile materials, including porcelain, ceramic, glass, and natural stone.
The pre-mixed nature of Prism SCG simplifies the installation process, saving time and reducing the potential for errors. It’s particularly beneficial for DIY enthusiasts and installers seeking a reliable, high-performance grout solution. This grout is engineered to provide long-lasting beauty and protection for tiled surfaces, minimizing maintenance and maximizing the lifespan of your tile installation.
Prism SCG is a game-changer in the flooring industry, offering unparalleled convenience and quality.
What is Prism SCG Grout? – Key Features & Benefits
Prism SCG Ultimate Performance Grout is a revolutionary single-component, pre-mixed grout formulated for exceptional performance and ease of use. Its key feature is the elimination of powder mixing, ensuring consistent quality and reducing installation time. This advanced formula boasts superior strength and flexibility, resisting cracking and shrinking.
Benefits include:
- Pre-Mixed Convenience: Ready to use straight from the container.
- Ultimate Performance: Exceptional durability and stain resistance.
- Single-Component: Simplifies application and reduces waste.
- Polymer-Modified: Enhanced bonding and flexibility.
- Wide Versatility: Suitable for various tile types and applications.
Prism SCG’s advanced composition provides a highly water-resistant barrier, protecting against mold and mildew growth. It’s designed for grout joints up to 1/2 inch wide, offering versatility for diverse tile layouts. The grout’s smooth consistency ensures effortless application and a professional finish, making it ideal for both professionals and DIYers.
Prism Grout vs. Traditional Grout – A Comparison
Traditional cement-based grouts require meticulous powder-to-water mixing, often leading to inconsistencies in color and performance. Prism SCG eliminates this variability with its pre-mixed formula, guaranteeing uniform results every time. Unlike traditional grouts prone to cracking and shrinking, Prism SCG’s polymer-modified composition offers superior flexibility and durability.
Here’s a direct comparison:
- Mixing: Prism SCG – Pre-mixed; Traditional – Requires mixing;
- Consistency: Prism SCG – Consistent; Traditional – Variable.
- Strength & Flexibility: Prism SCG – Superior; Traditional – Moderate.
- Stain Resistance: Prism SCG – Excellent; Traditional – Good.
- Ease of Use: Prism SCG – Very Easy; Traditional – Moderate.
Traditional grouts often necessitate sealing to prevent staining, while Prism SCG offers inherent stain resistance. Furthermore, Prism SCG’s single-component nature reduces waste and simplifies cleanup. While traditional grouts can be cost-effective upfront, Prism SCG’s longevity and reduced maintenance may offer long-term savings.
Preparing for Prism Grout Application
Proper preparation is crucial for optimal Prism SCG performance. This involves thoroughly cleaning the tile surface and ensuring a stable, clean substrate for lasting results.
Careful attention to detail during this phase will maximize adhesion and prevent future issues;
Surface Preparation – Cleaning & Ensuring Proper Substrate
Thorough surface preparation is paramount before applying Prism SCG Ultimate Performance Grout. Begin by removing all debris, dust, dirt, and any existing adhesives or sealants from the substrate. A vacuum cleaner with a brush attachment is excellent for initial dust removal.
Next, employ a suitable cleaning solution appropriate for the substrate material – concrete, plywood, or cement board. Follow the manufacturer’s instructions for dilution and application. Rinse thoroughly with clean water and allow the surface to dry completely. Any residual contaminants can compromise the grout’s adhesion and lead to future failures.
Crucially, ensure the substrate is structurally sound, level, and free from cracks or movement. Repair any imperfections before proceeding. For porous substrates, consider applying a primer to enhance adhesion and prevent rapid moisture absorption. Verify the substrate’s moisture content meets the tile and grout manufacturer’s specifications. A stable, clean, and dry substrate is the foundation for a successful Prism SCG installation.
Remember: A properly prepared surface guarantees optimal performance and longevity.
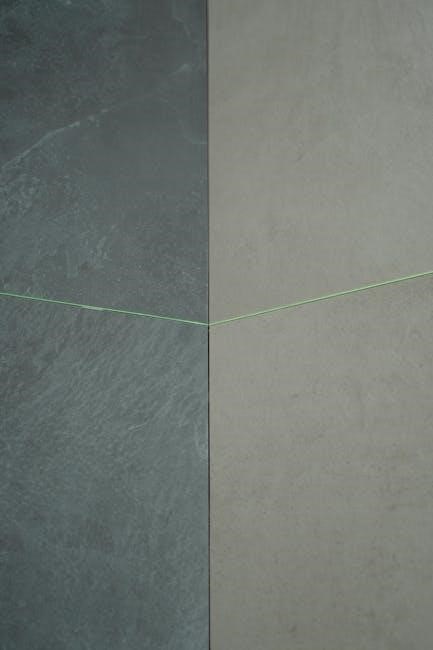
Tile Preparation – Ensuring Clean & Dry Tile Edges
Before applying Prism SCG grout, meticulous tile edge preparation is essential for achieving clean, consistent grout lines. Carefully remove any tile spacers that may remain lodged between the tiles. Inspect each tile edge for adhesive residue, particularly if adhesive was used liberally during installation.
Use a sharp utility knife or grout saw to gently scrape away any excess adhesive, ensuring not to damage the tile surface or chip the edges. A clean, sharp edge promotes proper grout adhesion and prevents unsightly buildup. Vacuum the tile surface and grout lines thoroughly to eliminate any debris created during the cleaning process.
Importantly, ensure the tile edges are completely dry before applying Prism SCG. Moisture can hinder the grout’s ability to bond effectively and may contribute to discoloration or efflorescence. Wipe down the tile edges with a clean, dry cloth if necessary. Properly prepared tile edges contribute significantly to a professional-looking and durable grout installation.
Note: Clean edges mean a beautiful, lasting finish.

Tools & Materials Needed for Prism Grout Application
Successfully applying Prism SCG Ultimate Performance Grout requires gathering specific tools and materials. You’ll need a clean bucket – though mixing isn’t required, it’s useful for waste. Essential tools include a grout float, preferably made of dense rubber, for efficient application and packing of the grout into the joints.
Several sponges are crucial for cleaning excess grout and creating a smooth finish. A clean, damp sponge is key to avoiding haze. A grout saw or utility knife will be needed for removing any remaining grout residue or correcting minor imperfections. A rubber grout float is also recommended for detailed work.
Additionally, have a microfiber cloth readily available for polishing the tile surface after cleaning. Safety glasses and gloves are recommended to protect your eyes and skin. Finally, ensure you have a vacuum cleaner with a brush attachment for removing dust and debris before and after the grouting process. Proper preparation ensures a smooth application.
Remember: Having the right tools makes all the difference.
Prism Grout Mixing & Application
Prism SCG is a pre-mixed grout, eliminating the need for on-site mixing. Simply open the container and apply directly to the tile joints for optimal results.
This convenient feature saves time and ensures consistent quality throughout your tiling project.
Mixing Prism SCG Grout – Achieving the Right Consistency
Prism SCG Ultimate Performance Grout stands apart due to its pre-mixed formulation, fundamentally changing the grouting process; Unlike traditional grouts requiring meticulous water addition, Prism SCG arrives ready to use directly from the container. This eliminates the common issues of inconsistent mixing, which can lead to weak grout or color variations.
However, slight adjustments to consistency may be desired based on personal preference or specific project needs. If a slightly softer consistency is preferred for easier application, a very small amount of water – a teaspoon at a time – can be carefully incorporated.
Important: Over-watering will compromise the grout’s performance characteristics, including strength and stain resistance. Thoroughly mix any added water using a low-speed mixer or paddle, ensuring a uniform consistency without introducing excessive air bubbles. The ideal consistency should resemble a smooth paste, holding its shape without being overly stiff or runny. Always test a small area first to confirm the adjusted consistency meets your requirements before proceeding with the entire project.
Applying Prism Grout – Techniques for Optimal Coverage
Prism SCG’s smooth, pre-mixed consistency facilitates effortless application. Begin by loading a generous amount of grout onto a rubber grout float, holding it at a 45-degree angle to the tile surface. Force the grout firmly into all grout joints, ensuring complete fill from corner to corner. Work in manageable sections, typically 4-6 square feet at a time, to maintain consistent pressure and prevent the grout from drying out prematurely.
Employ diagonal strokes across the tile, continually replenishing the float with grout as needed. Remove excess grout from the tile surface immediately after filling the joints, again using the grout float held at a steeper angle. Avoid excessive pressure, which can pull grout out of the joints.
For narrow or intricate joints, a smaller grout float or even a rubber-tipped tool may be beneficial. Regularly inspect the joints to confirm they are fully filled and free of voids. Proper application is crucial for achieving a waterproof and aesthetically pleasing result with Prism SCG.
Working Time & Open Time – Understanding Prism Grout’s Properties
Prism SCG, being a single-component grout, exhibits specific working time and open time characteristics vital for successful installation. “Working time” refers to the period during which the grout remains pliable and workable after application – approximately 2-3 hours under normal conditions (70-75°F/21-24°C). This allows ample time for filling joints and initial cleanup;
“Open time,” however, denotes the duration the grout remains receptive to cleaning and haze removal. Prism SCG typically offers an open time of around 20-30 minutes, depending on ambient temperature and humidity. Higher temperatures accelerate setting, shortening both working and open times.
It’s crucial to plan your application accordingly, working in sections that can be completed within the working time. Begin haze removal within the open time window for optimal results. Avoid disturbing the grout after the open time has elapsed, as this can compromise the bond and lead to discoloration.
Prism Grout Specific Considerations
Prism SCG’s versatility extends to various tile types, but specific considerations apply. Joint size, tile porosity, and material composition influence optimal results and longevity.
Grout Joint Size & Prism SCG Compatibility
Prism SCG Ultimate Performance Grout exhibits excellent compatibility across a range of grout joint sizes, however, adhering to recommended specifications is crucial for optimal performance and longevity. Generally, Prism SCG is ideally suited for grout joints ranging from 1/8 inch (3mm) to 1/2 inch (12mm) in width.
For narrower joints, below 1/8 inch, the grout may exhibit reduced workability and potentially compromise the complete filling of the joint space. Conversely, joints exceeding 1/2 inch may require additional support or consideration of alternative grouting solutions to prevent sagging or cracking during the curing process.
It’s important to note that wider joints may consume a larger volume of grout, potentially necessitating multiple applications to achieve a fully filled and polished surface. Always consult the product data sheet for the most up-to-date recommendations regarding joint size compatibility and application guidelines. Proper joint sizing ensures a durable, aesthetically pleasing, and waterproof grout line.
Using Prism Grout with Different Tile Types (Porcelain, Ceramic, Stone)
Prism SCG Ultimate Performance Grout demonstrates versatile compatibility with a wide array of tile materials, including porcelain, ceramic, and natural stone. However, specific considerations are vital for each tile type to guarantee optimal adhesion and prevent potential issues.
Porcelain and Ceramic tiles generally require minimal preparation, ensuring surfaces are clean and free of debris. Natural stone tiles, particularly those with porous surfaces like marble or limestone, may benefit from pre-sealing to mitigate staining and enhance grout adhesion. Always verify the sealant is compatible with Prism SCG.
For glass tiles, see the dedicated section on special precautions. When working with polished stone, a test area is recommended to confirm the grout doesn’t cause scratching or discoloration. Consistent cleaning of excess grout from tile surfaces is crucial, especially with textured tiles. Following these guidelines ensures a beautiful and long-lasting tile installation with Prism SCG.
Prism Grout for Glass Tile – Special Precautions
Glass tile installations demand meticulous attention due to the material’s unique properties. Prism SCG can be used with glass tile, but several precautions are essential to prevent scratching, staining, or damage to the delicate surface.
Employ a non-abrasive, soft-faced grout float to apply Prism SCG, working diagonally across the tile to minimize direct pressure. Avoid excessive rubbing or manipulation of the grout on the glass surface. Immediate and thorough cleaning is paramount; use a clean, damp sponge and multiple water changes to remove all grout residue before it hardens.
Consider using a grout release agent specifically designed for glass tile as a preventative measure. Always test the grout release in an inconspicuous area first. Avoid acidic cleaners during the final cleaning phase, as they can etch the glass. Patience and gentle handling are key to achieving a flawless finish with Prism SCG and glass tile.
Cleaning & Maintenance of Prism Grout
Prism SCG grout offers exceptional stain resistance and ease of maintenance. Regular cleaning with a pH-neutral cleaner preserves its appearance, ensuring long-lasting beauty and performance.
Initial Cleaning – Removing Excess Grout Haze
Prism SCG grout, being a premium formulation, may leave a slight haze on the tile surface after the initial curing period. This is a normal occurrence and is easily removed with the appropriate cleaning method. It’s crucial to begin this process once the grout has sufficiently hardened, typically within 24-72 hours, but always refer to the product data sheet for specific timing.
Begin by sweeping or vacuuming the tiled surface to remove any loose grout residue. Then, prepare a solution of warm water and a pH-neutral tile cleaner, following the cleaner’s instructions carefully. Avoid using acidic or abrasive cleaners, as these can damage the grout or tile.
Apply the cleaning solution to the surface and allow it to dwell for a few minutes to loosen the haze. Use a clean, non-abrasive sponge or microfiber cloth to gently wipe the surface in a circular motion. Rinse thoroughly with clean water, changing the water frequently to avoid re-depositing the haze. For stubborn haze, a grout haze remover specifically designed for use with epoxy or pre-mixed grouts may be necessary. Always test any cleaning product in an inconspicuous area first to ensure compatibility.
Repeat the process until all haze is removed, and the tile surface is clean and clear. Finally, dry the surface with a clean, dry cloth to prevent water spots.
Regular Cleaning – Best Practices for Maintaining Prism Grout
Maintaining the pristine appearance of Prism SCG grout is straightforward with consistent, gentle cleaning practices. Daily or weekly cleaning should focus on removing surface dirt and grime to prevent buildup. A simple solution of warm water and a pH-neutral cleaner is generally sufficient for routine maintenance.
Avoid abrasive cleaners, scouring pads, and harsh chemicals like bleach or ammonia, as these can dull the grout’s finish and potentially cause discoloration. Instead, opt for a soft sponge or microfiber cloth and gentle circular motions. Rinse thoroughly with clean water after cleaning, ensuring no cleaner residue remains.
For areas prone to grease or spills, such as kitchens and bathrooms, prompt cleanup is essential. Wipe up spills immediately to prevent staining. Regular sealing (every 1-2 years, depending on traffic) can further enhance stain resistance and protect the grout. Always follow the sealant manufacturer’s instructions.
Consistent, gentle cleaning will preserve the beauty and longevity of your Prism SCG grout installation, keeping it looking its best for years to come.
Stain Resistance & Dealing with Common Stains
Prism SCG grout boasts excellent inherent stain resistance, but proactive measures and prompt attention to spills are key to maintaining its appearance. While highly durable, certain substances can potentially stain if left unattended for extended periods.
For oil-based stains, like cooking oil or grease, absorb as much as possible with a clean cloth or paper towel. Then, apply a paste of baking soda and water, let it sit for 30 minutes, and gently scrub with a soft brush. For water-based stains, such as coffee or juice, a mild detergent solution and gentle scrubbing are usually effective.
Stubborn stains may require a specialized grout stain remover, always following the product’s instructions carefully. Test any cleaning solution in an inconspicuous area first to ensure it doesn’t affect the grout’s color. Regular sealing significantly enhances stain resistance, creating a protective barrier against common household spills.
Remember, immediate cleanup is the best defense against permanent staining, preserving the beauty of your Prism SCG grout.

Troubleshooting Prism Grout Issues
Prism SCG, while robust, can occasionally present challenges. This section addresses common issues like efflorescence, cracking, and color variation, offering practical solutions for a lasting result.
Efflorescence – Causes & Solutions
Efflorescence, the white, powdery deposit appearing on grout joints, is a common concern, particularly in newly installed tile work using Prism SCG. It isn’t a structural issue, but rather a visual one, caused by soluble salts migrating to the surface as moisture evaporates.
These salts originate from the cement in the grout, the substrate, or even the tiles themselves. Proper substrate preparation, ensuring it’s fully cured and free of excess salts, is crucial preventative measure. Adequate ventilation during and after application also aids in moisture evaporation, minimizing the risk.
To address existing efflorescence: Begin with dry brushing to remove the surface deposit. Avoid using harsh chemicals initially. For stubborn cases, a diluted solution of muriatic acid (following all safety precautions – gloves, eye protection, ventilation!) can be carefully applied, followed by thorough rinsing with clean water. Always test in an inconspicuous area first.
Prism SCG’s formulation helps resist efflorescence, but complete prevention relies on proper installation techniques and environmental control. Consistent monitoring and prompt attention to any initial signs will maintain the grout’s aesthetic appeal.
Cracking Grout – Identifying & Addressing the Problem
Cracking in Prism SCG grout can indicate underlying issues, ranging from minor settling to more significant structural problems. Identifying the type of crack is crucial for effective repair. Hairline cracks are often cosmetic and can be addressed with a grout repair product specifically designed for Prism SCG.
Larger, wider cracks, or those that are consistently growing, suggest movement in the substrate. This could be due to inadequate subfloor preparation, insufficient support, or even foundation issues. Addressing the root cause of the movement is paramount before attempting any grout repair.
To repair cracks: Remove the damaged grout using a grout saw or removal tool. Thoroughly clean the joint, ensuring it’s free of debris. Apply new Prism SCG, carefully filling the void. Follow the manufacturer’s instructions for curing time. For significant movement, consider installing a flexible sealant instead of grout in the affected areas.
Preventative measures include ensuring a stable subfloor and proper tile installation techniques. Regularly inspect grout lines for early signs of cracking, allowing for timely intervention and preventing further damage.
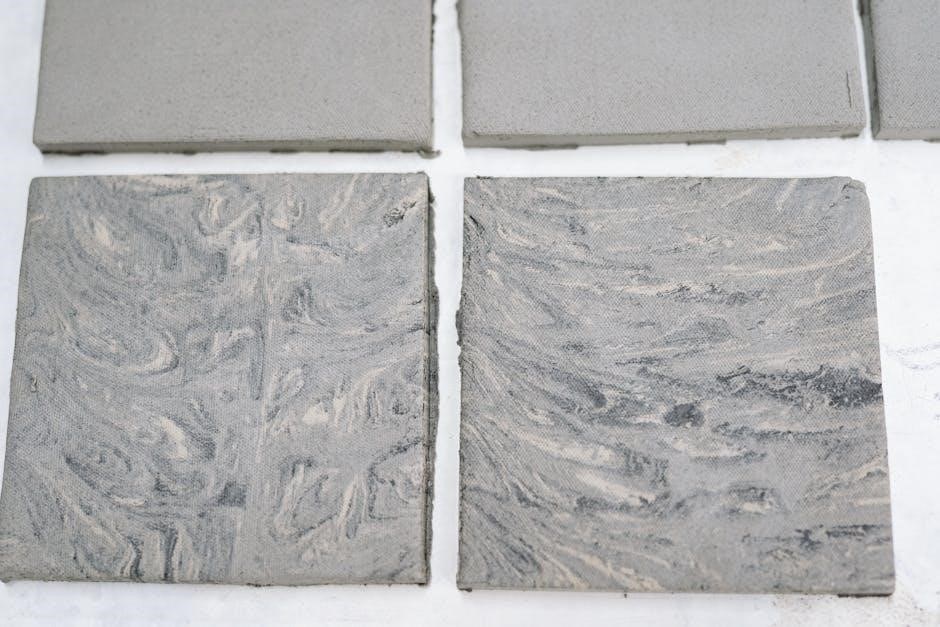
Color Variation – Understanding & Minimizing Discrepancies
Prism SCG grout, like many cement-based grouts, can exhibit slight color variations. This is a natural characteristic due to differences in raw materials and the hydration process. These variations are generally subtle and considered acceptable within industry standards, especially across larger installations.

To minimize noticeable discrepancies, always purchase enough Prism SCG grout from the same dye lot to complete the entire project. Avoid mixing grout from different batches, as this can lead to visible color differences. Before application, consider performing a dry layout to assess the overall color consistency.
Proper mixing is crucial. Ensure the grout is thoroughly mixed to a uniform consistency, following the manufacturer’s instructions. Apply the grout in sections, maintaining a consistent working pace. After application, use a damp sponge to clean the tile surface, being careful not to over-clean and remove pigment from the grout joints.
Sealing the grout can also help to even out the color appearance and protect against staining. Understand that slight variations are normal, and embracing them can contribute to the unique character of your tile installation.