GE Double Oven Self Clean Instructions: A Comprehensive Guide
Navigating the self-cleaning features of your GE double oven can be straightforward, yet understanding the nuances ensures optimal performance and safety. This guide provides detailed instructions,
troubleshooting tips, and maintenance advice for a consistently clean and functional appliance.
Understanding Your GE Double Oven
GE double ovens offer a convenient cooking experience, but mastering their self-clean function requires understanding the oven’s specific components and operation. These ovens typically feature two separate oven cavities, allowing for simultaneous cooking at different temperatures. However, the self-clean cycle operates on one oven at a time, a crucial point to remember.

The self-clean cycle utilizes extremely high temperatures – exceeding 880°F – to burn off food residue. This process transforms food particles into ash, which can then be easily wiped away. A key safety feature is the oven door lock mechanism, activated during the self-clean cycle to prevent accidental opening. This lock is controlled by a motor and switch assembly, and malfunctions can occur, preventing the door from unlocking post-cycle.
Before initiating the self-clean, familiarize yourself with your oven’s control panel. Different models may have slightly varying interfaces, but the core functions remain consistent. Knowing the location of the self-clean button and any associated settings (cycle duration, lock/unlock controls) is essential for a smooth cleaning process. Always refer to your owner’s manual for model-specific details.
Safety Precautions Before Self Cleaning
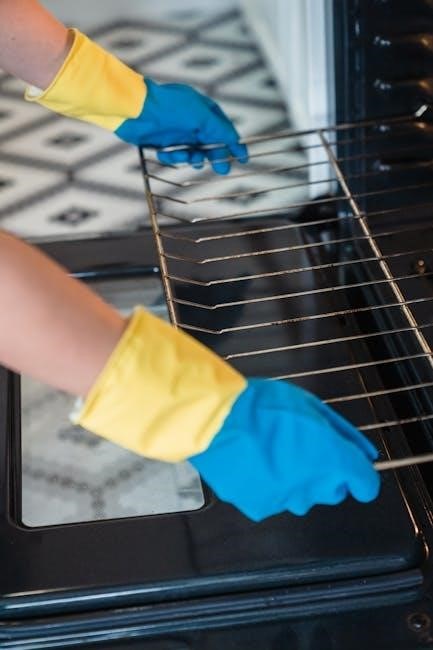
Prioritizing safety is paramount before initiating the self-clean cycle on your GE double oven. The high temperatures involved necessitate careful preparation to prevent hazards. Firstly, ensure the kitchen is well-ventilated, as the self-clean process can release odors. Remove all oven racks, cookware, baking stones, and any aluminum foil from both oven cavities. These items can become damaged or pose a fire risk at such extreme temperatures.
Crucially, turn off the surface burners on your cooktop; they will not function during the self-clean cycle, but ensuring they are off beforehand is a vital precaution. Avoid using abrasive, acidic, or alkaline cleaners on the oven’s interior, as these can release harmful fumes when heated. Wipe up any large spills or loose debris from the oven floor, as these can contribute to smoke production.
Keep children and pets away from the oven during the entire self-clean cycle and cool-down period. The exterior of the oven will become extremely hot. Read the Self-Cleaning Oven Safety Instructions in your owner’s manual before commencing the cycle to fully understand potential risks and preventative measures.
Preparing Your Oven for the Self-Clean Cycle

Thorough preparation is key to a successful and safe self-clean cycle for your GE double oven. Begin by removing all items from both oven interiors – this includes racks, baking stones, thermometers, and any cookware. Even seemingly heat-resistant items can be damaged by the extreme temperatures reached during self-cleaning. Wipe down the oven interiors with a damp cloth to remove any loose food particles or debris. While the self-clean cycle will burn off residue, removing larger pieces minimizes smoke and odor.
Pay close attention to the oven floor, ensuring it’s free of significant spills or grease buildup. Avoid using commercial oven cleaners before running the self-clean cycle, as their residue can create harmful fumes when heated. Ensure the oven door can close completely; any obstruction can prevent the door lock from engaging properly.
Finally, familiarize yourself with your oven’s control panel and locate the self-clean function. Consult your owner’s manual if needed. A properly prepared oven ensures a more efficient and effective self-clean, leaving you with a sparkling clean appliance.
Initiating the Self-Clean Cycle ⏤ Single Oven
Starting the self-clean cycle on a single GE oven is generally a straightforward process. First, ensure the oven is completely empty and prepared as outlined in the previous section. Press the “Self Clean” button on your oven’s control panel. Depending on your model, you may be prompted to select a clean time – typically ranging from 2 to 4 hours – or the oven may automatically set a duration.
Some GE ovens offer a “Light Clean” option for less heavily soiled ovens, reducing the cycle time. Once you’ve selected your desired clean time, press the “Start” or “OK” button to initiate the cycle. The oven door will automatically lock, and the self-clean cycle will begin. Do not attempt to open the door during the cycle, as this could be dangerous.
The oven will heat to extremely high temperatures, burning off food residue. A burning smell is normal during this process. Monitor the cycle’s progress, if your model displays it. Once complete, the oven will cool, and the door will unlock automatically.
Initiating the Self-Clean Cycle ─ Double Oven (One Oven at a Time)
GE double ovens are designed to self-clean one cavity at a time. This is a crucial point to remember when utilizing this feature. Begin by ensuring the oven you intend to clean is completely empty, with all racks removed. Select the desired oven – upper or lower – using the corresponding control panel buttons.
Press the “Self Clean” button on the control panel for the selected oven. As with a single oven, you may be prompted to choose a cleaning duration, or the oven may default to a pre-set time. Initiate the cycle by pressing “Start” or “OK”. The door of the selected oven will lock automatically, and the self-cleaning process will commence.
It’s important to note that only the chosen oven will heat up during the cycle; the other oven remains unaffected. Once the cycle is complete, the door will unlock. Repeat the process for the second oven when ready. Remember to always follow safety precautions and allow for adequate cooling time between cycles.
Self-Clean Cycle Duration and Monitoring
The duration of a GE double oven’s self-clean cycle varies, typically ranging from 2 to 4 hours, depending on the selected cleaning level and the amount of soil present; Some models offer options for light, medium, or heavy cleaning, influencing the cycle’s length. During operation, the oven will reach extremely high temperatures – exceeding 800°F – to burn off food residue.
Monitoring the cycle is generally limited due to the locked door and high temperatures. However, most GE ovens display the remaining cycle time on the control panel. Avoid opening the oven door during the self-clean process, as this can disrupt the cycle and pose a safety hazard.
Be aware of any unusual smells or excessive smoke. While some odor is normal, strong or persistent smells warrant investigation. Once the cycle concludes, the oven will automatically cool down before the door unlocks. Allow sufficient cooling time before accessing the interior.
Understanding the Oven Door Lock Mechanism
The oven door lock mechanism is a critical safety feature activated during the self-clean cycle on GE double ovens. It prevents accidental opening while the oven reaches extremely high temperatures, protecting users from severe burns. The lock engages automatically when the self-clean cycle begins and remains active throughout the process and cooling period.
This mechanism typically consists of a motor and switch assembly. The switch detects when the oven reaches the appropriate temperature, signaling the motor to engage the locking mechanism. It’s crucial not to force the door open while locked, as this could damage the mechanism.
If the door doesn’t unlock after the cycle completes, it usually indicates a problem with the lock motor or switch; Refer to the troubleshooting section for guidance, but avoid attempting to manually override the lock unless specifically instructed in the owner’s manual, as this could compromise safety.
Troubleshooting: Oven Door Won’t Unlock After Self-Clean
Encountering a locked oven door post-self-clean is a common concern with GE double ovens, often stemming from a malfunctioning door lock mechanism. First, ensure the oven has completely cooled down; the lock won’t release until the internal temperature drops sufficiently. Verify the control panel displays “End” or indicates the cycle is finished.
If the door remains locked, a defective door lock motor or switch assembly is a likely culprit. Some models allow access to the locking mechanism by removing screws or panels – always consult your owner’s manual for specific instructions before attempting this.
Avoid forceful attempts to open the door, as this can cause further damage. If you’re uncomfortable disassembling parts, or the issue persists, scheduling a repair appointment with a qualified technician is recommended; Bodewell and similar services specialize in GE oven repairs and can diagnose and resolve the problem safely and efficiently.
Troubleshooting: Self-Clean Cycle Not Starting
When your GE double oven’s self-clean cycle refuses to initiate, several factors could be at play. First, confirm the surface burners are completely turned off – the oven won’t start the cycle if they’re active. Ensure the oven door is fully closed and latched; the safety mechanism requires this for operation.
Check for error codes displayed on the control panel, as these provide valuable clues about the issue. Consult your owner’s manual to decipher the code’s meaning. A tripped circuit breaker or blown fuse can also prevent the cycle from starting; reset the breaker or replace the fuse if necessary.

If the problem persists, review the manual for additional troubleshooting steps. Restarting the cycle after these checks can sometimes resolve the issue. Should service be needed, contacting a professional repair service like Bodewell is advisable for a thorough diagnosis and repair.
Troubleshooting: Self-Clean Cycle Stopping Mid-Cycle
Encountering a self-clean cycle that halts prematurely on your GE double oven can be frustrating. A common cause is a power interruption, even a brief one. Check your circuit breaker to ensure it hasn’t tripped. If it has, reset it and attempt to restart the cycle.
Excessive smoke or debris buildup can also trigger a pause. While some smoke is normal, significant amounts signal a problem. Ensure the oven is free of large food spills or grease accumulations before initiating the cycle. A faulty door lock switch might also be the culprit, preventing the cycle from continuing as a safety measure.
If the issue persists, consult your owner’s manual for specific error codes. Restarting the clean cycle after addressing potential causes may resolve the problem. If not, scheduling a repair appointment with a qualified technician is recommended for a professional assessment and repair.
Cleaning After the Self-Clean Cycle
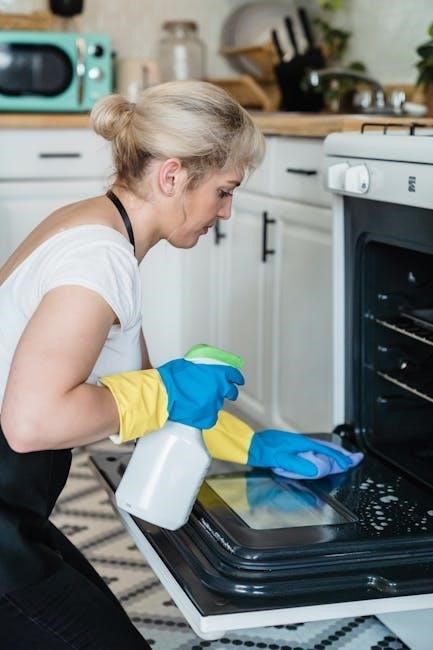
Following the intense heat of the self-clean cycle, a fine ash residue will remain within your GE double oven. Allow the oven to cool completely before attempting any cleaning. This is crucial for safety and prevents potential burns.
Once cooled, simply wipe away the ash with a damp cloth. Avoid abrasive cleaners or scouring pads, as these can damage the oven’s interior. For stubborn residue, a paste of baking soda and water can be gently applied and wiped clean. Remember to clean both the upper and lower oven cavities.
Pay attention to the oven door and frame, wiping away any ash accumulation. Inspect the door gasket for any damage and clean it carefully. Avoid washing self-cleaning panels with abrasive, acid, or alkaline cleaners. A tepid water and mild detergent solution is best. Regular post-cycle cleaning maintains optimal oven performance.
Dealing with Smoke During Self-Clean
Some smoke during the self-clean cycle is normal, particularly if there’s a significant buildup of food residue. This is due to the high temperatures incinerating the debris. However, excessive smoke warrants attention. Ensure adequate ventilation by opening windows or turning on the kitchen exhaust fan.
If smoke becomes thick or persistent, immediately stop the cycle by pressing the ‘Cancel’ button. Allow the oven to cool completely before opening the door. Check for any large food spills or grease accumulations that may be causing the excessive smoke. Remove these manually before attempting another self-clean cycle.
Avoid self-cleaning if you’ve recently cooked foods that produce a lot of smoke, like heavily oiled or fatty items. Ensure the oven is free of aluminum foil, cookware, or any other items before initiating the cycle. If the issue persists, consult a professional repair service, as it could indicate a problem with the oven’s heating element or ventilation system.
Maintaining Your GE Double Oven
Regular maintenance extends the life of your GE double oven and ensures optimal performance. After each self-clean cycle, allow the oven to cool completely before wiping away any ash residue with a damp cloth. Avoid abrasive cleaners, as they can damage the oven’s interior surfaces.
Periodically clean the oven door glass with a glass cleaner to maintain visibility. Inspect the door seals for any damage or wear, and replace them if necessary to prevent heat loss. Clean the cooktop regularly to prevent spills from baking onto the surface.
For manual cleaning between self-clean cycles, use a mild dish soap and warm water solution. Avoid using oven cleaners on the self-cleaning surfaces. Always refer to your owner’s manual for specific cleaning recommendations. Proper care will keep your GE double oven functioning efficiently for years to come.
When to Consult a Professional Repair Service
Despite diligent troubleshooting, some GE double oven issues require professional attention. If the oven door remains locked after the self-clean cycle completes and simple fixes fail, a technician is needed to address potential motor or switch assembly defects.
Similarly, if the self-clean cycle consistently fails to start, even after checking power supply and control panel settings, a professional diagnosis is crucial. Recurring mid-cycle stoppages also warrant expert evaluation, as they may indicate underlying electrical or control board problems.
Don’t attempt complex repairs yourself, as this could void your warranty or create safety hazards. Bodewell and other qualified appliance repair services specialize in GE ovens and can efficiently resolve issues like heating problems or persistent door lock malfunctions. Prioritize safety and professional expertise for lasting solutions.
GE Double Oven Self-Clean: Important Safety Instructions
Prior to initiating the self-clean cycle on your GE double oven, several safety precautions are paramount. Always ensure the cooktop surface burners are completely turned off; they will not function during the cleaning process. Remove all cookware, baking stones, and aluminum foil from both oven cavities to prevent potential damage or fire hazards.
Never use abrasive, acidic, or alkaline cleaners on the oven’s self-cleaning panels, as these can compromise their protective coating. Clean the surrounding oven area only with tepid water and a mild detergent. Be aware that the self-clean cycle generates significant heat, so keep children and pets away from the oven during operation.
Read the complete Self-Cleaning Oven Safety Instructions detailed in your owner’s manual before each use. Proper ventilation is essential, and avoid touching the oven’s interior surfaces until they have cooled completely after the cycle finishes.